Online Appointment Request & Booking Form for Dog Daycares
Last Updated: October 14, 2024 • Visit Blog Homepage

Using DoggieDashboard's simple online appointment request form, your clients can submit appointment requests and your business can accept or deny these requests.
To get started, the first thing you'll want to do is copy and paste the Request Appointment html code from DoggieDashboard onto your website, and then your website visitors can click the button and be taken to your appointment request page.
Below is a simple four-step overview of how the online appointment request page works:
Step 1: The Appointment Request Form
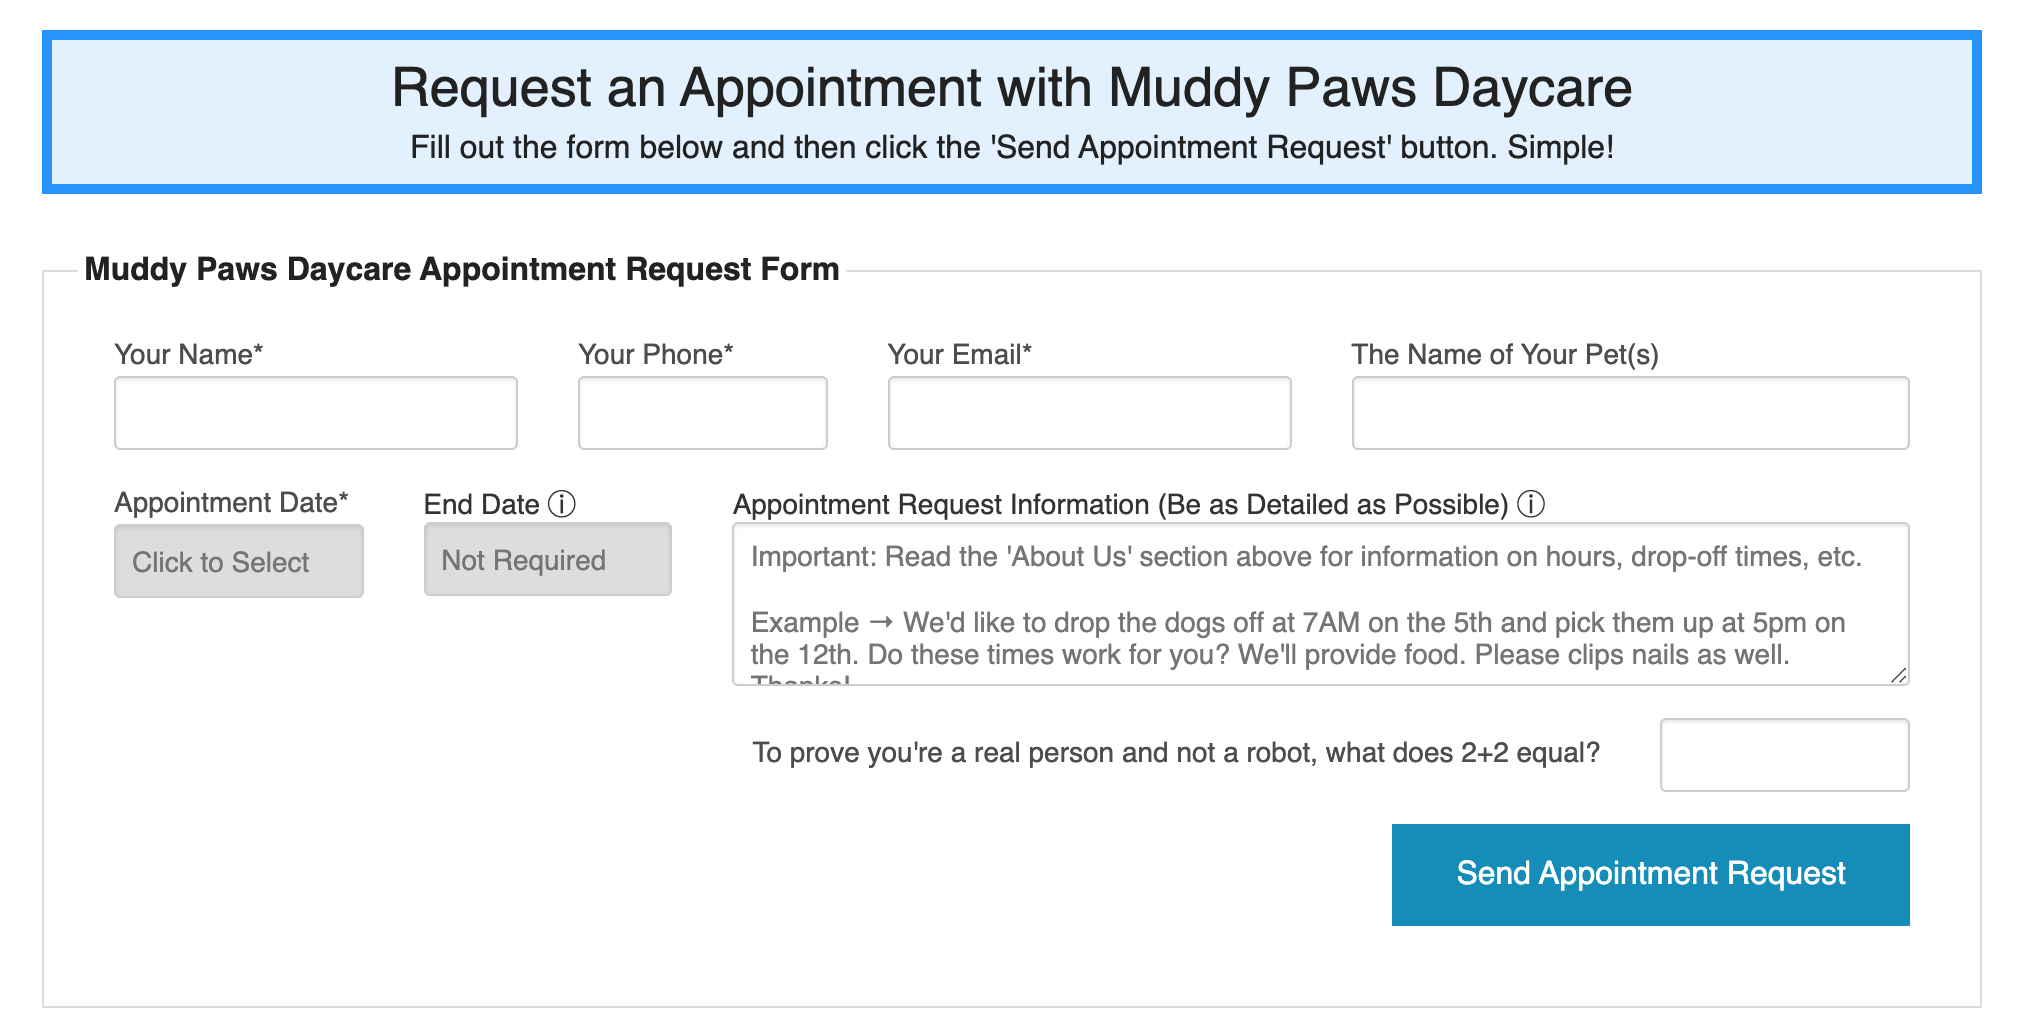
One of the differences between DoggieDashboard and other software providers is that we don't offer a customer login portal. After interviewing pet owners, we realized that most pet owners don't want ANOTHER username and ANOTHER password to remember, just to schedule the occasional doggie daycare appointment. Not to mention that a large percentage of the population these days is still not computer literate. It'd be nice if everyone was super technical and could schedule an appointment through an app, but we all know someone that still doesn't know how to log into Wi-Fi! 😂
With that insight in mind, DoggieDashboard built a way where your current clients can request an appointment by simply using their name and email address. If you recognize their name and email when the request comes in, you can add their appointment in a few clicks, without forcing them to log into a system to request an appointment.
Step 2: Submitted Appointment Request

Using the appointment request information provided by your client, you're either able to accept the appointment on your calendar, or you can click on your client's email address in blue and open an email pop-up that lets you send them an email asking for more appointment details (like if they forgot to mention the drop off time, etc).
Step 3: New Appointment Form

If you recognize the client that requested the appointment and their pet(s) are already stored in your database, the process is as simple as typing in the pet's name into the search box and selecting it from the list. Once the pet is selected, you'll be prompted to add any siblings if the pet has any. Then it's just a matter of setting the drop-off and pick-up times.
If the appointment is going to be kennel-based, you'll also want to select the kennel where the pet(s) will be staying during their appointment. You can also include information like appointment type, sending a confirmation email, adding a pet taxi and employee, etc.
There's also the ability to set up an email appointment reminder that will get sent one or three days before the appointment. These are great for reducing no-shows. If you want to be even more sure of eliminating no-shows, you can use the text message reminder feature. This feature sends out a text message reminder at 6pm the night before the appointment.
Step 4: New Appointment on Appointment Calendar

If you selected that you wanted to include an owner confirmation email while creating the appointment, the pet owner will have just received an email with all necessary appointment information.
As you can see, DoggieDashboard's online appointment request form makes it super simple for dog daycares, kennels, boarders and groomers to accept online appointments. There's no confusing logins for pet owners to get stuck in. All your clients need to do is visit your appointment request form, submit their appointment information and then wait for either the confirmation email or the denial email.
3,722 Page Views since December 18, 2020
Need tips for running your pet business? Check out the popular posts below or visit the DoggieDashboard blog homepage.