Git Stash Tutorial for Saving Code Changes in Separate Branch (with Pics)
Last Updated: January 17, 2019 • Visit Blog Homepage
Git always made me a little bit scared. It's very powerful, and when I was first starting to program, I'd get stuck and break stuff. Or, I'd get flailing around, trying to fix a merge conflict (which can be a nightmare) and then I'd somehow get stuck in VIM and screw everything up.
That said, I've made it a point to get better at GIT during 2019. I don't want to be nervous when using it, I want to feel like I have a command while using it.
This is true for anything. If you're nervous about doing something, it's most likely because you don't feel like you're fully prepared for whatever it is. That might be a good thing or a bad thing.
If you're nervous while going downhill mountain biking, maybe it means you should practice doing regular mountain biking for a while and slowly advance into downhill. But airshow pilots like Patty Wagstaff aren't 'nervous' before their flights. Maybe they're nervous about how the crowd will react to their new trick, but they're not nervous about being able to perform said trick. They're confident in their ability to perform.
Anyways, I didn't feel confident enough using Git for the past couple years. I wanted to become better, and today, I learned a nice little trick that makes life much easier. I've highlighted the steps below for stashing unsaved changes so that you can relocate them to a new feature branch. I'll explain each step below the picture.
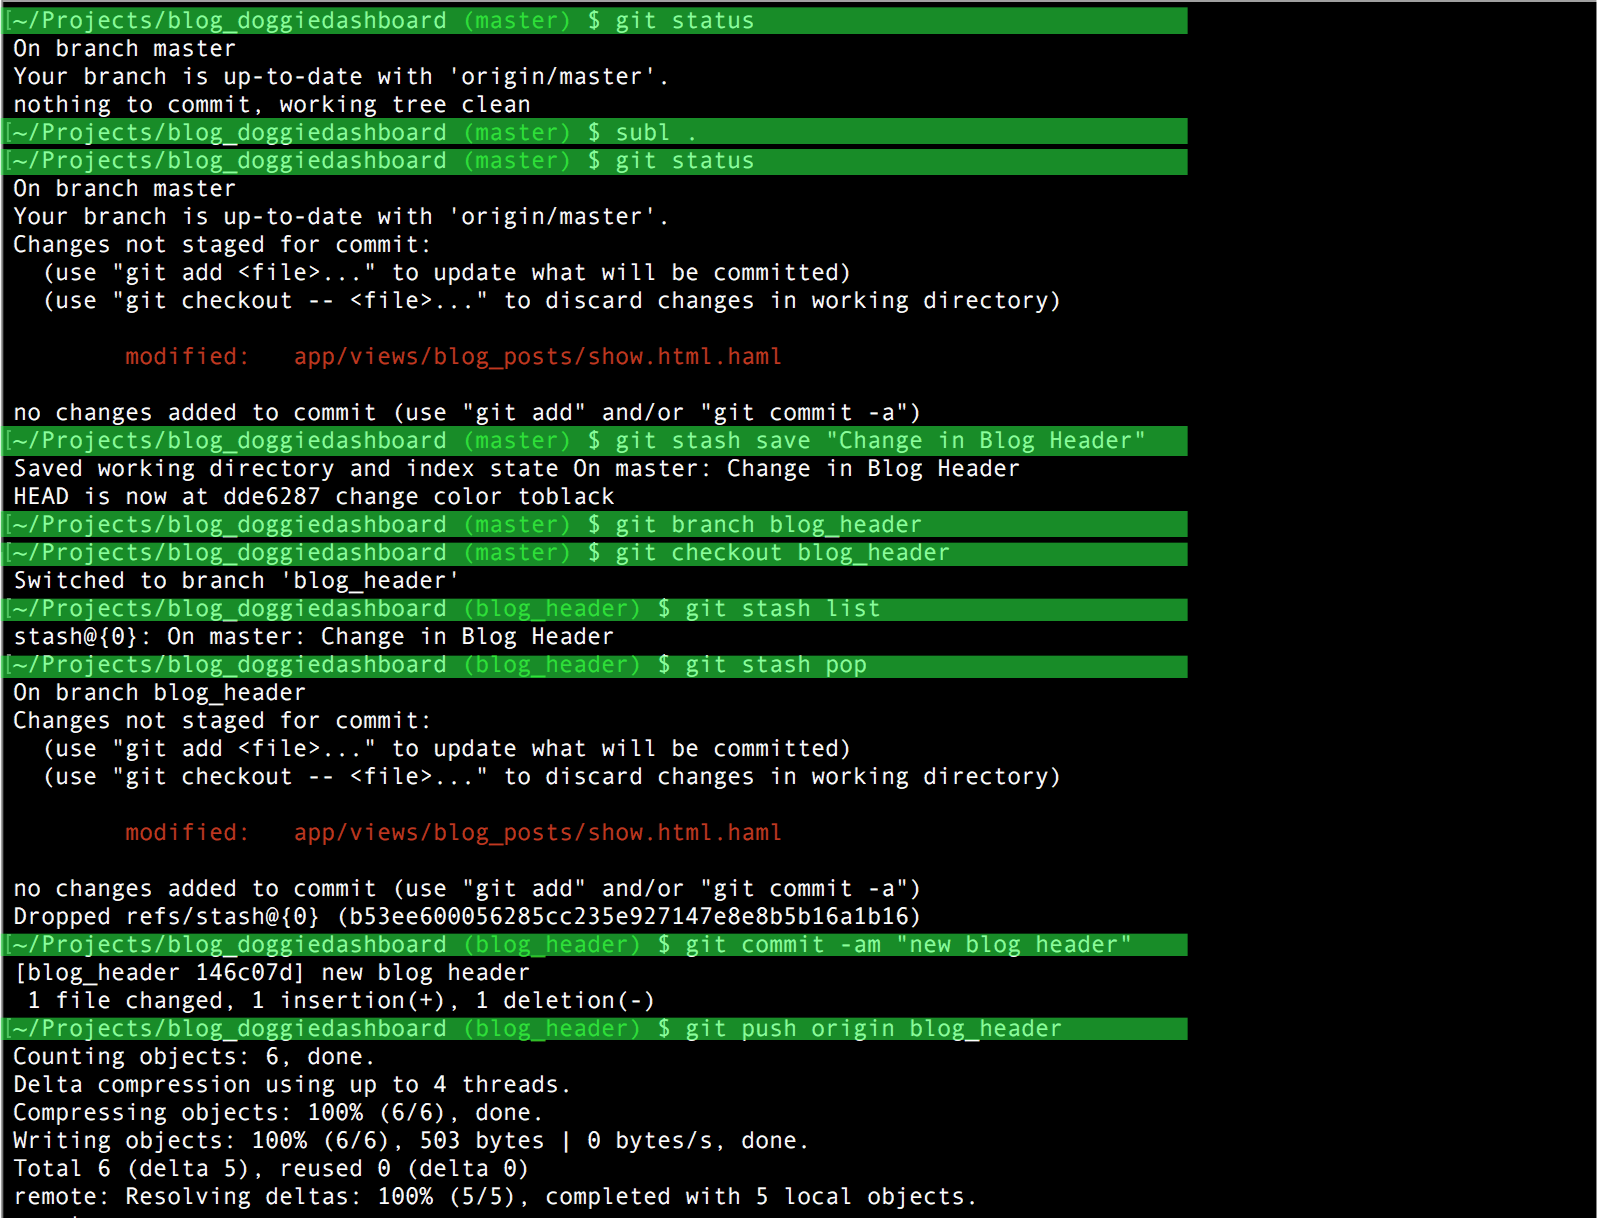
git status
Here I’m checking to make sure I’m on a clean branch. As you can see, there are no changes to commit. Right here is when I SHOULD have changed over to a feature branch, but I didn’t.
subl .
Here I open up my Sublime Text 2 editor and make some changes to the blog’s title tag logic.
git status
You can see now that the change I made to the title tag is registering with Git.
git stash save “Write-Note-Here”
I realized that I made these changes on my master branch, instead of on a a feature branch. What to do now? Easy, let’s stash these changes. Stashing changes basically saves them and removes all your changes from the branch you’re currently working on. So, writing git stash save ‘Change in Blog Header’ saves the title tag change that I made and puts it aside. After stashing these changes, the branch is back to its original state before I made the changes.
git branch blog_header
Here I’m creating a new git branch that will eventually be the home of these changes.
git checkout blog_header
Checking out the new ‘blog_header’ feature branch so that I can “unstash” the changes that I made on the original master branch.
git stash list
Here I wanted to make sure that the changes that I stashed are still visible, which they are.
git stash pop
This command applies the most recent stashed change stash@{0}. If you have more than one stashed change, they’ll be listed in reverse chronological order, where stash@{0} is the most recent and stash@{1} is an older stash, stash@{2} is even older, etc. The pop command, after it applies your most recent changes, also deletes the stash from the computer, so you don’t need to worry about dropping it later. If you wanted to apply a different stash (if you had more than one), you can use the git stash apply stash@{2} command.
git commit -am “new blog header”
Creating the commit for the new changes.
git push origin blog_header
Pushing the changes to the blog_header feature branch for safe keeping. My master branch is clean for bug fixes and I can merge in the blog_header branch when it’s finished. Once finished, erase the branch on Github (below) and push the changes to Heroku (git push heroku master)!
